Cart
0
Table of Contents
- What You'll Need Before You Start Training
- Your 12-Week Backpacking Conditioning Plan
- How to Train With a Weighted Pack Safely
- Building a Hiking Endurance Training Schedule
- Strength, Core Stability, and Balance for Multi-Day Expeditions
- Preventing Injuries and Managing Overuse Symptoms
- Training for Specific Terrain: Scree, Snow, and Altitude
- Recovery, Rest Days, and Post-Expedition Protocols
- Frequently Asked Questions
Last Updated: September 22, 2026
What You'll Need Before You Start Training
Training for a multi-day expedition is the process of building the endurance, strength, and recovery habits your body needs to carry a loaded pack over consecutive days of hiking. It takes 8-12 weeks of structured work, not a few weekend walks. This guide from GreatAdventureSupply breaks down exactly what that looks like.
Watch Out
The most common mistake is buying a heavy pack and filling it on day one. Start with an empty pack and add weight slowly, or you'll strain your back and knees before the trip even starts.
Your 12-Week Backpacking Conditioning Plan
A 12-week backpacking conditioning plan builds from base fitness to peak readiness, adding load and incline every few weeks before tapering. Skipping the progression is how people get hurt. Here's the structure.
Weeks 1-4: Building Your Base
Base mileage comes first. Walk 3-4 times per week, starting at 30 minutes and working up to 60. Add two short strength sessions focused on squats, lunges, and planks. Keep the pack off your back for now.
Weeks 5-8: Adding Load and Incline
Now add weight and vertical gain. Carry 10-15 pounds on one or two walks per week, and find hills or stairs. This is where step endurance and aerobic capacity start to matter.
Weeks 9-12: Peak, Taper, and Terrain Rehearsal
Peak weeks push pack weight to your target load. Then taper: cut volume in the final 10 days so your legs are fresh. Rehearse the terrain you'll actually face.
| Phase | Weeks | Focus | Pack Weight |
|---|---|---|---|
| Base | 1-4 | Mileage, strength | None |
| Build | 5-8 | Load, incline | 10-15 lbs |
| Peak | 9-12 | Target load, taper | Full pack |
How to Train With a Weighted Pack Safely
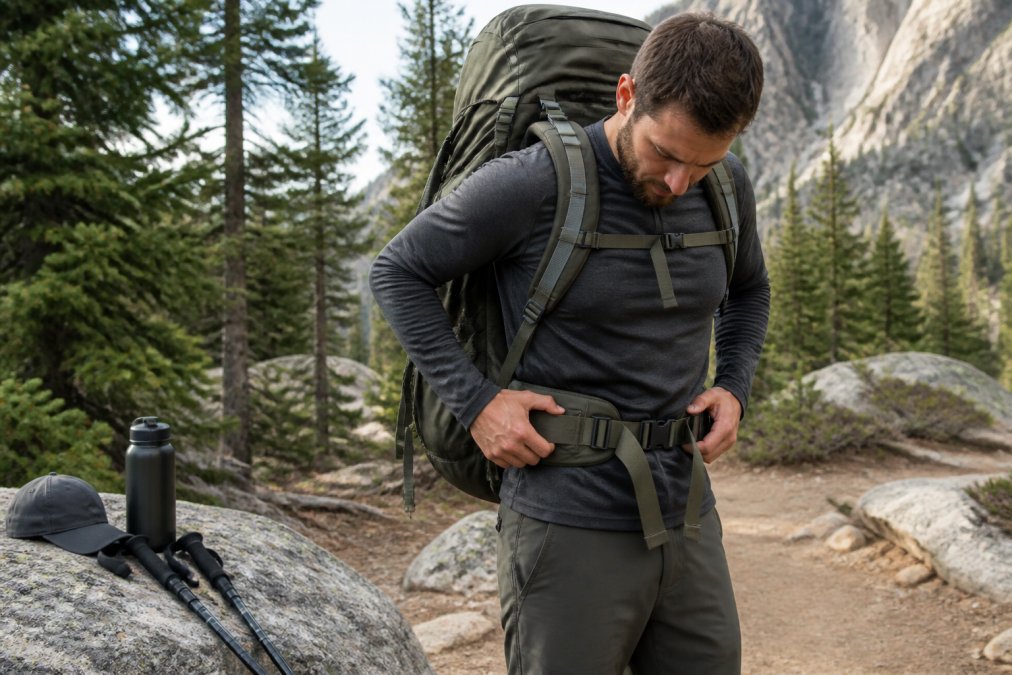
Training with a weighted pack safely means loading gradually, keeping the weight close to your spine, and watching your form on every step. Load carriage punishes sloppy posture.
Choosing and Loading Your Pack
A 55-60L pack handles most multi-day trips. The Large Capacity Outdoor Climbing Backpack is built for exactly this: durable Oxford construction, an ergonomic support frame, and a breathable design for long-distance trekking. For heavier loads, the 90L Waterproof Hiking Camping Backpack offers enough room for 5+ day adventures.


Load Progression and Form Cues
Add no more than 10% of pack weight per week. Keep the heaviest items high and close to your back, tighten the hip belt so it carries the load, and take shorter strides on descents.
Pro Tip
Your hip belt should carry roughly 80% of the weight, not your shoulders. If your shoulders ache after a training hike, your belt is too loose.
Building a Hiking Endurance Training Schedule
A hiking endurance training schedule splits your week between cardio and strength so neither gets neglected. Here's a workable split.
Weekly Cardio and Strength Split
- Monday: Strength (squats, lunges, planks)
- Tuesday: Cardio walk, 45-60 minutes
- Wednesday: Rest or mobility work
- Thursday: Stair climbing or incline walking
- Friday: Strength (core and balance)
- Saturday: Long hike with pack
- Sunday: Recovery day
Stair Climbing, Incline Walking, and Intervals
Stair climbing builds step endurance fast. Incline walking on a treadmill at 8-12% grade mimics trail climbing. Add intervals once a week to push your anaerobic threshold.
Strength, Core Stability, and Balance for Multi-Day Expeditions
Core stability and balance training protect your joints on uneven ground, which is where most trail injuries happen. Strength work also reduces muscle fatigue on long days.
Key Takeaway
Two strength sessions per week is enough. More than that and you'll eat into recovery time you need for the long hikes.
Preventing Injuries and Managing Overuse Symptoms
Injury prevention comes down to progression and rest. Most overuse injuries from expedition training trace back to adding load or mileage too fast.
Watch for these warning signs:
- Sharp knee pain on descents
- Persistent shin or heel soreness
- Lower back tightness that doesn't ease overnight
Training for Specific Terrain: Scree, Snow, and Altitude
Most training plans treat "hiking" as one activity. It isn't. Scree, snow, and altitude each load your body differently, and the gap between a fit hiker and a prepared one usually shows up on the third day of a specific surface. This is the section most guides skip, so treat it as your edge.
Scree and Talus: Ankle Strength and Balance Under Load
Loose rock is unstable ground, so your stabilizer muscles, calves, peroneals, and the small muscles around the ankle, do the work your quads would do on a trail. Train them directly:
- Single-leg balance on an unstable surface. Stand on one foot on a folded towel or balance pad, 3 sets of 30-45 seconds per leg, twice a week. Add a light pack once bodyweight feels easy.
- Lateral band walks. A resistance band around the ankles, 3 sets of 15 steps each direction, builds the hip abductors that keep your knee tracking over your toe on shifting rock.
- Step-downs onto an uneven surface. Stand on a low box, lower one foot slowly to a pillow or foam pad, tap, and press back up. 3 sets of 10 per leg. This mimics the controlled descent scree demands.
- Practice on real scree if you can. A gravel pile, a rocky drainage, or a talus slope at a local park beats a treadmill for specificity. Wear the footwear you'll actually use.
On scree, shorten your stride and keep your center of mass over your feet. Poles help, but they don't replace ankle strength, they just buy you time.
Snow and Ice: Traction, Stride Mechanics, and Cold Exposure
Snow changes two things: your foot doesn't grip the way it does on dirt, and your body burns more energy staying warm. Train both.
- Traction practice. If your route uses microspikes or crampons, do at least two training hikes in them on packed snow or icy trails. The point is to learn how the points bite and how your stride shortens. A common mistake is overstriding in spikes and catching a point on the backswing.
- Kick-stepping and plunge-stepping drills. On a safe snow slope, practice kicking steps with the toe of your boot on the way up and driving the heel in on the way down. These are the two techniques you'll use most on snow, and they use different muscles than trail hiking.
- Cold-weather layering rehearsal. Do at least one long training hike in the layers you plan to wear. You're testing whether you can regulate temperature while moving, not just whether the jacket is warm.
- Snowshoes if your route needs them. Snowshoeing widens your stance and stresses the hips differently. Two or three sessions is enough to adapt.
Altitude: What You Can and Can't Train
Altitude is the terrain type you can't fully train for at home. What you can do is prepare your body to acclimatize faster and recognize the symptoms early.
- Build your aerobic base hard before you go. A stronger aerobic system handles lower oxygen better. This is the one place where generic cardio pays off for altitude specifically.
- Arrive early if your schedule allows. The Cleveland Clinic overview of altitude sickness explains that acclimatization takes time and can't be rushed. A common pattern is to spend one or two nights at a moderate elevation before pushing to your highest point.
- Sleep low, climb high. If your route allows it, sleep at a lower camp and day-trip to higher elevation. This is a well-known acclimatization strategy among mountaineers.
- Know the warning signs. Headache, nausea, dizziness, and shortness of breath at rest are the early signals. Descending is the only reliable treatment. Do not push through.
- Hydrate and eat more than feels natural. At altitude, appetite drops and dehydration is common. Both make altitude sickness worse.
Poles: One Piece of Gear That Helps on All Three
Hiking poles reduce knee load on descents and add a third point of contact on unstable ground. The Travel Folding Walking & Hiking Poles fold to 13.5 inches, come with snow baskets and rubber feet, and adjust to three sizes, so you can swap the tip for the terrain you're on.

Match your training surface to your route. If your expedition is 60% scree, 60% of your training hikes should include unstable ground. Generic trail miles won't prepare the specific muscles that terrain demands.
Recovery, Rest Days, and Post-Expedition Protocols
Recovery days are training days. Your body adapts during rest, not during the hike itself. Schedule at least one full rest day per week and keep training days non-consecutive where possible. But the recovery most guides skip entirely is the one that matters most: the week after your expedition ends.
Weekly Rest and Recovery During Training
- One full rest day per week, minimum. No pack, no long walk. Easy movement like a short flat walk or mobility work is fine.
- Sleep is the highest-leverage recovery tool. Most adults need 7-9 hours. During peak training weeks, aim for the upper end.
- Protein and fluids. Recovery from long loaded hikes depends on adequate protein and rehydration. A common pattern is to under-eat on big training days and then wonder why the next session feels flat.
- Mobility work after every session. Hips, ankles, and thoracic spine. Ten minutes is enough.
Post-Expedition Recovery: The Week Most People Get Wrong
The week after a multi-day trek is when nagging injuries surface. Your body has been under load for days, your immune system is often suppressed, and your connective tissue has taken cumulative stress. Treat it like a taper in reverse.
Warning Signs That Need More Than Rest
- Pain that wakes you at night
- Swelling that doesn't go down with elevation and ice
- Persistent shin or heel soreness that lasts more than a week
- A knee that gives way or locks
These are the signals to see a physical therapist or physician rather than push through. The CDC guidance on physical activity and injury notes that gradual progression reduces injury risk, and the same principle applies to returning to training after a big effort.
Why This Section Matters More Than the Training Plan
Most guides stop at the start line. But the hikers who keep doing multi-day expeditions year after year are the ones who recover well, not the ones who train the hardest. A structured post-expedition protocol is what turns one trip into a lifelong practice.
The week after a big trip is when nagging injuries surface. Treat it like a taper in reverse: light walks, mobility, and no heavy pack. If you feel great on day three, resist the urge to train hard, that's the trap.
Frequently Asked Questions
What is the best training for multi-day hikes?
A balanced plan combines three elements: cardiovascular endurance (incline walking, stair climbing, cycling), strength training (squats, lunges, step-ups, planks), and weighted pack hikes. Start with a backpacking conditioning plan 12 weeks out, gradually adding pack weight and distance. Aim for at least two long hikes per week with your loaded pack, plus two strength sessions and two cardio sessions. This mix builds the stamina, leg strength, and core stability needed for consecutive days on the trail.
How many months in advance should I start training for a long-distance expedition?
Most hikers benefit from a 12-week (about 3-month) training window. If you are already fit, 8 weeks can work; if you are new to hiking or carrying a heavy pack, allow 16 weeks. The key is progressive overload: increase weekly mileage by no more than 10% and add pack weight gradually. Starting too late often leads to overuse injuries, so give yourself a buffer to build base mileage before adding intensity.
How do I build leg strength for carrying a heavy pack?
Focus on compound movements that mimic trail demands: squats, lunges, step-ups, and deadlifts. Eccentric loading (lowering slowly) builds tendon resilience for downhill sections. Twice a week, do 3 sets of 10-12 reps of each exercise, increasing weight or reps each week. Pair this with weighted pack hikes on uneven terrain to train balance and core stability. A strong posterior chain (glutes, hamstrings, lower back) is especially important for load carriage.
How can I prevent common injuries during long-distance expeditions?
Injury prevention starts with a gradual training ramp: avoid sharp increases in mileage or pack weight. Include rest days and non-consecutive training days to let muscles recover. Strengthen your core and hips to stabilize joints, and practice joint mobility and stretching after each session. Footwear break-in is critical: wear your hiking boots on training hikes to avoid blisters. If you feel persistent joint pain, reduce load and consult a physical therapist. Training with pre-existing conditions requires medical clearance and modifications.
Planning a multi-day expedition is demanding, but the training doesn't have to be complicated. GreatAdventureSupply carries the packs, poles, and gear that make conditioning and the trip itself easier, all selected for durability in real conditions. Browse our backpack collection to find the right capacity for your route, then add to cart and start training with the gear you'll actually carry.