Cart
0
Last Updated: October 25, 2026
Quick Summary
A stove repair kit is a small pouch of tools and spare parts that lets you fix a backpacking stove in the field instead of ending a trip early. Pack nine essentials: duct tape, paracord, a multitool, safety pins, a sewing needle, zip ties, spare O-rings, a jet cleaning tool, and a fire starter. A DIY kit weighs about 200-350 grams and costs far less than a pre-built kit.
- Carry two or three O-rings in the exact size your stove uses, since sizes vary by model.
- Clean a clogged jet with the specified wire tool, never a knife tip or random pin.
- Do a five-minute maintenance check at home: inspect the O-ring, check the jet, test the seal and flame.
- Diagnose failures in order of fuel supply, connection, and burner before making a fix.
- Treat any fuel leak you can't stop as a hard stop and do not use the stove.
Table of Contents
- Why a Stove Repair Kit Belongs in Every Pack
- Your Backpacking Repair Kit Checklist: The 9 Essentials
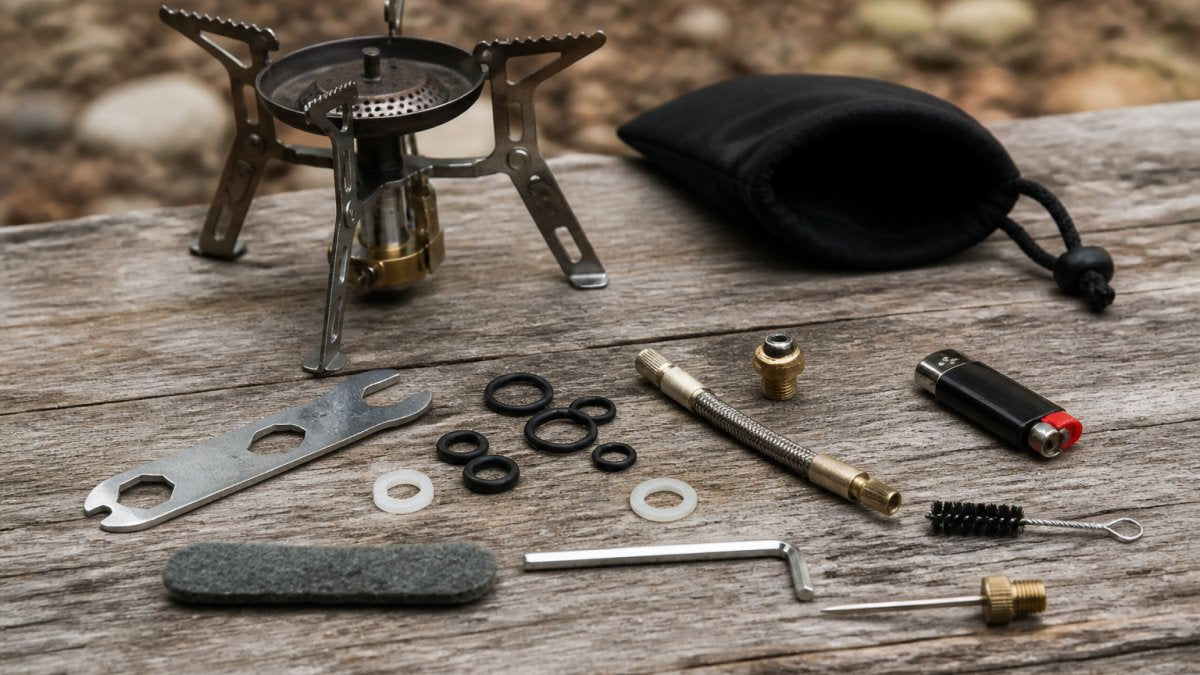
- Camp Stove Spare Parts to Carry
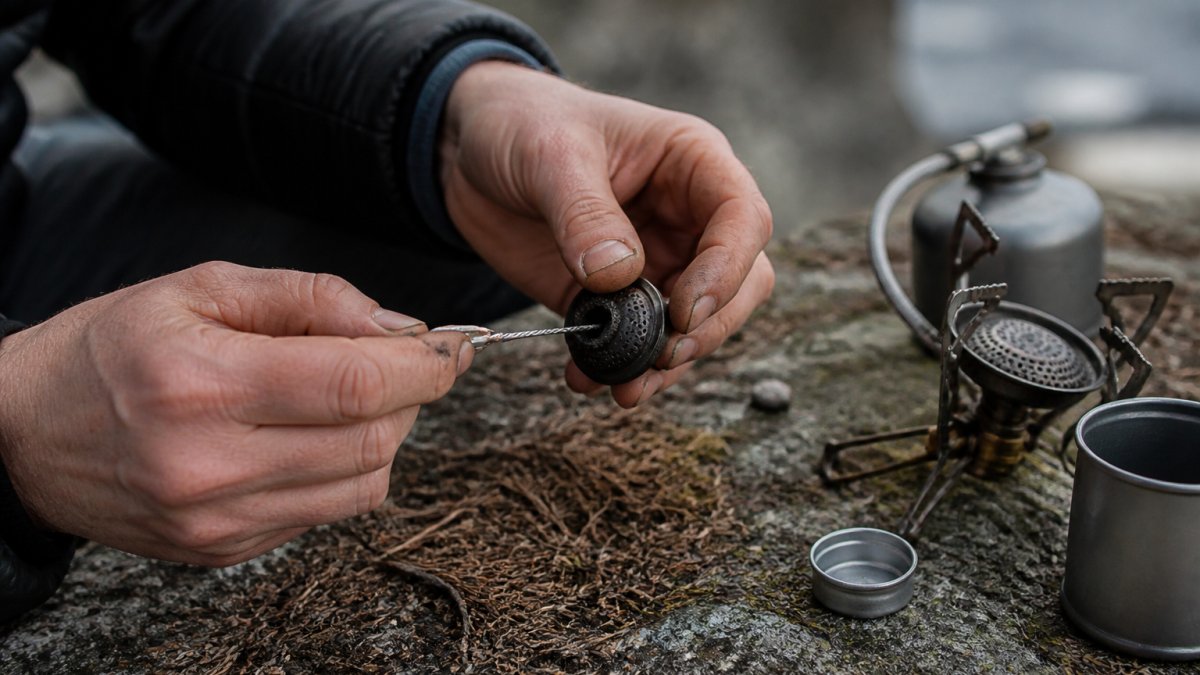
- How to Clean a Backpacking Stove Jet
- Backpacking Stove Maintenance Before Every Trip
- Field Repair Steps for Common Stove Failures
- Packing Your DIY Kit: Weight, Cost, and Sourcing
- Stock Your Stove Repair Kit at GreatAdventureSupply
- Frequently Asked Questions
Why a Stove Repair Kit Belongs in Every Pack
A stove repair kit is a small pouch of tools and spare parts that lets you fix a backpacking stove in the field instead of ending a trip early.
Cold, wind, and long days stress a cooking system. A clogged jet or dried-out O-ring can shut down dinner in seconds, and the fix takes minutes, but most hikers never pack the parts to do it.
That's why a DIY kit earns its place next to your first-aid pouch: it weighs almost nothing and saves trips.
Your Backpacking Repair Kit Checklist: The 9 Essentials
A complete backpacking repair kit checklist covers nine items: duct tape, paracord, a multitool, safety pins, a sewing needle, zip ties, spare O-rings, a jet cleaning tool, and a fire starter. Together they handle nearly every field repair a backpacking stove or shelter will need.
Here's the full list in one view:

| # | Essential | Fixes |
|---|---|---|
| 1 | Duct tape | Hose splits, tent tears, pole wraps |
| 2 | Paracord | Guy lines, lashings, boot laces |
| 3 | Multitool | Loose screws, bent parts, cutting |
| 4 | Safety pins | Zipper pulls, fabric tears, splints |
| 5 | Sewing needle and thread | Pack and tent fabric |
| 6 | Zip ties | Pole repairs, hose clamps |
| 7 | Spare O-rings | Fuel leaks at the canister seal |
| 8 | Jet cleaning tool | Clogged jets and orifices |
| 9 | Fire starter | Backup ignition |
Tape, Cordage, and Fasteners
Duct tape does more than patch. Wrap a meter or two around a water bottle or trekking pole to save space. Use it to seal a split fuel hose, wrap a cracked tent pole, or patch a torn stuff sack.
Paracord handles anything that needs tying: a broken guy line, a loose load, or a bootlace. Safety pins and a sewing needle cover fabric repairs, and zip ties make fast work of pole repairs and loose connections.
Tools, Spares, and Ignition
A multitool is the backbone of any gear repair kit. Look for pliers, a small knife, and screwdrivers, pliers are the key tool for bending a bent stove leg or tightening a loose fitting.
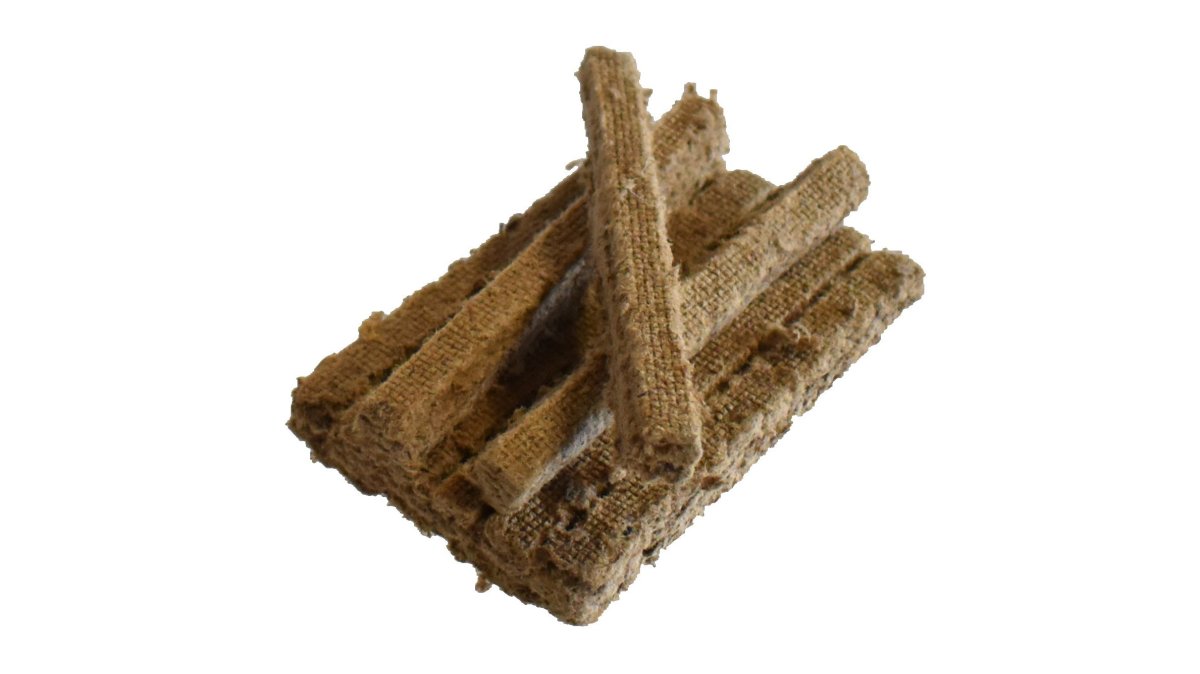
Spare parts matter more than most hikers expect. For ignition, a fire starter with a magnesium rod and striker works in rain, wind, or snow and never runs out of fuel like a lighter can.
Camp Stove Spare Parts to Carry
The spare parts worth carrying depend on your stove type, because canister, liquid-fuel, and alcohol stoves fail in different places.
| Stove type | Parts that commonly fail | Spares to carry | Model-specific? |
|---|---|---|---|
| Canister (screw-on or pierceable) | O-ring at the canister seal, jet/orifice, igniter, valve stem | 2-3 O-rings in the stove's size, jet cleaning wire, spare igniter if removable | O-ring size and jet are model-specific |
| Liquid-fuel (white gas, multi-fuel) | Pump cup/leather, fuel hose and O-rings, jet, generator/primer | Pump cup, 2-3 fuel-rated O-rings, jet, small wrench | Pump and generator are model-specific |
| Alcohol (wick or pressurized) | Wick, jet/orifice, cap gasket, pot stand | Spare wick, cap gasket, cleaning wire | Wick and gasket are model-specific |
O-rings. These seal the stove-to-canister connection and fuel-line joints.
Jet and orifice cleaning tool. The jet is the tiny opening that meters fuel, and it clogs with soot, dust, and residue.
Igniter. Piezo igniters are convenient but fail in cold, wet, or dirty conditions.
Wick and cap gasket (alcohol only). Alcohol stoves are simple, but a worn wick or hardened cap gasket can stop one cold.
Pro Tip
Before you buy spares, write your stove's make and model on a piece of tape inside your repair pouch. That label is what lets you reorder the right O-ring or jet later, and it's the detail most hikers forget.
What to leave at home: full rebuild kits, spare burners, and duplicate multitools. They add weight without covering a failure you can fix on the trail. If a part is model-specific and expensive, do preventive maintenance at home instead of packing a spare.
How to Clean a Backpacking Stove Jet
To clean a backpacking stove jet, remove the burner head, pull out the jet, and clear the tiny opening with a jet cleaning tool or a thin wire. Then blow through it, reinstall it, and test the flame before you cook.
Here are the steps in order:
- Let the stove cool completely and disconnect the fuel canister.
- Remove the burner head or the jet cover, following your stove's manual.
- Take out the jet with the correct tool. Don't force it.
- Push the cleaning wire through the opening from the clean side.
- Blow through the jet to clear loose debris.
- Reinstall the jet and burner, then test with a small amount of fuel.
Watch out: never poke a jet with a knife tip or a random pin. You can widen the opening, and an oversized jet burns rich and wastes fuel. For more on keeping clogs from coming back, see our guide on preventing backpacking stove clogs in the field.
Backpacking Stove Maintenance Before Every Trip
Backpacking stove maintenance takes about five minutes and prevents most field failures. Do it at home, before you pack, not at camp when you're hungry and tired.
Run through this quick check:
- Inspect the O-ring. Look for cracks, flattening, or stiffness. Replace it if it looks worn.
- Check the jet. Hold it up to light. If you can't see through it, clean it.
- Test the seal. Connect a canister and listen for a hiss before lighting.
- Clean the burner. Wipe away soot and food residue with a cloth.
- Test the flame. Light it briefly and check for a steady blue flame.
A yellow, sputtering flame usually means a dirty jet or low fuel; a hiss at the connection means a bad O-ring. Both are easy fixes if you catch them at home. For a broader routine, our DIY outdoor gear maintenance guide walks through the full pre-trip checklist.
Field Repair Steps for Common Stove Failures
Work through stove problems in a fixed order: stop, isolate, inspect, fix, then test.
Watch Out
If you smell fuel, hear a steady hiss with the valve closed, or see liquid fuel pooling, stop. Shut the valve, move the stove away from your shelter and any flame, and let it ventilate before you inspect anything. Never troubleshoot a stove inside a tent, near dry grass, or while it's hot.
Step 1, Isolate the problem. Disconnect the fuel, let the stove cool, and check three things in order: fuel supply, connection, and burner. Most failures fall into one of those buckets, and the order saves you from cleaning a jet when the real problem is an empty or cold canister.
Step 2, Diagnose by symptom.
| Symptom | Likely cause | Field fix | Stop-use? |
|---|---|---|---|
| Weak or yellow flame | Clogged jet, low fuel, cold canister | Clean jet with the wire tool; warm canister in a pocket or inside a jacket (never over flame); refuel | No, if flame returns to steady blue |
| Leak or hiss at the canister | Worn or misseated O-ring, loose connection | Replace O-ring; reseat and hand-tighten only | Yes, if leak persists after reseating |
| Stove won't light | Failed igniter, no fuel flow, clogged jet | Try a lighter or ferro rod to confirm fuel flow; clean jet; replace igniter if removable | No, unless fuel smell is present |
| Flame at the wrong place (around the valve or hose) | Cracked hose, failed seal | Do not light. Shut valve and isolate | Yes, do not use |
| Bent leg or pot support | Drop or packing load | Straighten gently with multitool pliers; support pot by hand if needed | No, if stove sits stable |
Step 3, Make the fix. Clean the jet from the clean side with the specified wire, blow through it, and reinstall. Replace a suspect O-ring rather than reseating it twice.
Step 5, Decide whether to keep using it. Field fixes are temporary. A cleaned jet or replaced O-ring is a real repair and can last the trip.
Key Takeaway
Carry the parts that match your stove type, fix in the order of fuel → connection → burner, and treat any fuel leak you can't stop as a hard stop. The kit buys you a hot meal; it doesn't make a damaged stove safe.
For broader precautions before you light up, see our backpacking stove safety tips for beginners.
Packing Your DIY Kit: Weight, Cost, and Sourcing
A DIY stove repair kit weighs about 200-350 grams and costs far less than a pre-built kit. You probably already own half the items.
Here's how to pack it:
- Use a small stuff sack or zip pouch. A clear pouch helps you find items fast.
- Wrap tape around a bottle instead of carrying a full roll.
- Cut paracord to length. You rarely need more than 3 meters.
- Store O-rings in a tiny bag so they don't get lost.
- Label the pouch so it's easy to grab in the dark.
O-rings, zip ties, and safety pins are cheap and sold in multi-packs; the multitool is the biggest single purchase, but buy once and it serves your whole kit for years.
Sourcing matters too. Our Gas Backpacking Stove uses standard canisters and folds down small, making it a practical base for a repair kit.

Stock Your Stove Repair Kit at GreatAdventureSupply
Building a reliable kit starts with the right gear. GreatAdventureSupply carries the outdoor essentials that make trips safer and easier, from cooking systems to survival tools, all in one place.
Our gear is selected for performance and comfort in real conditions, multifunctional, portable equipment designed to work when it matters, all without bouncing between stores. Browse our Gas Backpacking Stove to pair with your repair kit.
Get started with GreatAdventureSupply and build a stove repair kit that keeps your next trip cooking.
Frequently Asked Questions
What should be in a backpacking stove repair kit?
A working stove repair kit covers cleaning, fastening, and ignition. Pack a jet cleaning tool or fine wire, spare O-rings, a multitool, duct tape, paracord, safety pins, zip ties, and a fire starter. Add a spare igniter if your stove uses one.
How do you clean a clogged backpacking stove jet?
Remove the burner head and locate the jet, the tiny brass orifice the fuel passes through. Push a jet cleaning tool or a single strand of fine wire through the opening, then blow through it to clear debris. Never enlarge the hole with a drill bit or needle, since that changes fuel flow and can make the stove unsafe. Reassemble and test the flame before you rely on it.
What spare parts should I carry for a camping stove?
Carry the parts that fail most: O-rings for the fuel line connection, a spare igniter. A pump cup for liquid-fuel stoves is worth the ounce. Match every spare to your exact stove model, because O-ring sizes vary between brands.
Can you repair a leaking backpacking stove fuel line in the field?
A leaking fuel line is a stop-use situation. Shut off the fuel, let the stove cool, and check that the connection is tight and the O-ring is intact. If the hose itself is cracked, do not tape it and light it. A taped fuel line can fail under pressure and cause a fire. Carry a spare O-ring for connection leaks, and treat a damaged hose as a reason to replace the stove rather than repair it.
A dead stove in the backcountry is a choice you can avoid. Pack the nine essentials, clean your jet, and check your O-rings before every trip. When you're ready to upgrade your cooking setup, GreatAdventureSupply has the stoves and tools to match. Add to Cart and hit the trail with gear you can trust.